
Print yourself
- Aug 24, 2025
- 3 min read
Last August, I wrote this blog post explaining why a digital photo is absolutely incomparable to a printed version. And while I used to have to use a photo lab, that's now a thing of the past.
The title of this blog post already gave it away: I bought a photo printer. After some online research, I found a Canon Pro-310.

This printer is a so-called inkjet printer. It uses 10 different pigment inks and can print up to a maximum size of A3+ (329x483mm). Moreover, this printer can also produce panoramic prints up to 1.80m long!
Installing the software and such is a breeze, but it does take some time. The real journey of discovery only begins after that: what kind of paper will you use? To keep track of the enormous selection available, I ordered a sample pack from a few brands. This way, you can properly compare everything in A4 format before committing to the rather expensive A3+ paper.
It quickly became clear to me that the choice of paper is a very personal one and can also vary depending on the type of photo you want to print. The different paper types all have their strengths and weaknesses. For example, the texture of matte "watercolor paper" creates a beautiful effect in photos with lots of detail. But personally, I found this same texture too distracting in a photo with few details.
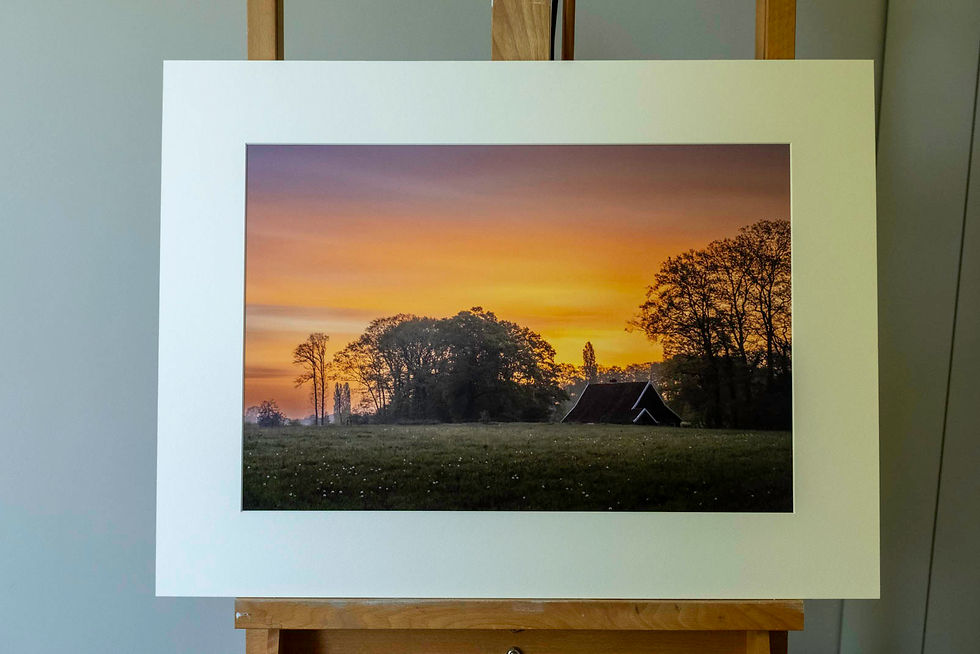
Ultimately, I chose Baryta Photographique II from Canson. This baryta paper has a satin sheen and a barium sulfate coating, which ensures high image quality (color and contrast) and long durability. It's also traditionally the traditional photo paper used in darkrooms and excels in black and white printing. I can tell you, the first print that rolled out of my printer on this paper absolutely astonished me.

A few tips (from my own early experience) if you're also planning to buy a printer and print your own photos:
I use Lightroom for post-processing, but the first print from Lightroom had some very strange green tones. I have no idea why, but printing with the included Canon software works perfectly.
It's absolutely essential to set the screen brightness lower than you normally do and to be consistent. The photo in a print isn't backlit, but reflects light. On my MacBook, I select a brightness of 6 bars.
A good printer and paper produced fantastic prints. It would be a shame to handle these prints without gloves. The acids and oils from our skin can affect the paper and cause stains. A cheap pair of cotton gloves for just €5 is enough to prevent this.
After buying the printer, I quickly bought a Logan brand mat cutter. Because, in my opinion, a beautiful print always deserves a mat. It's not only the icing on the cake in terms of appearance and quality, but if you plan to frame the photo, a mat also provides extra protection by creating a gap between the print and the glass.

And best of all, I feel like my creativity has now come full circle. While it all starts with taking a photo and then editing it, printing it yourself (and perhaps framing it) adds a third and final step to the entire creative process. A step that gives me absolutely more satisfaction than I could ever have imagined.


Comments